Showing posts with label chainsaw carving. Show all posts

Thursday, August 26, 2010

My 2010 Chainsaw Black Bear

I usually only chainsaw carve one bear every year as part of our camp fundraiser effort. Here's this years bear that I just completed yesterday that was cut from a yellow pine log measuring about 40" tall and 12" diameter. The 'actual' bear is about 29" tall.

Like last year's bear I used Rustoleum oil based paint for the main color which I mixed with about 40 percent paint thinner. I love these oil based paints which penetrate the wood like nothing else can. If you'd like to see more of the entire carving process I have uploaded 40 quality pictures here which is a public address that anyone can access.

Friday, October 2, 2009

A Chainsawed Bald Eagle


I just posted a video slide show of a bald eagle chainsaw carving that I did in September. I've never attempted an eagle by chainsaw before so I thought that I'd give it a try. I used a bald eagle walking stick that I carved 5 or 6 years ago as a reference since my eagles sometimes tend to look more like parrots. (HA).
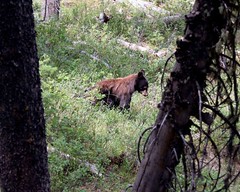
He is an injured bald eagle now living at the ...Image via Wikipedia


I used a well seasoned yellow pine log that was about 4' tall and it worked out just great. After roughing I completed smoothing it up with my regular carving tools which also included the eyes. This was a nice challenge since my talent lies more with the mystical and fantasy side of carving rather than the "realistic".

At our annual fundraiser auction this eagle went for $95.00 which was a fair price. However, I might concentrate on my black bear chainsaw art more since that one posted here brought $270.00!

Wow!

Monday, September 14, 2009

Chainsaw: The "Keebler" Man

Earlier this year I carved a mini woodspirit on a small "Hobbit" sized walking stick at about 13" tall.(See picture below-right) It was mostly just a decorative stick but I really liked the acorn head that I had put on him and it got a lot of compliments. All of this led to last week when I decided to make a big chainsaw carved "Mr. Acorn Head" man out of a pine log that was a bit over 4 feet tall.

As the pictures to the right show, I started on top of the log by first shaping up the acorn, then sketched in a rough outline of the face and then the funnest part (at least to me) of any chainsaw carving... sawing on the beard/hair by texturing with the tip of the chainsaw blade. On a bear or eagle that texture would be the fur or feathers but all of it's done with the side tip of the blade in an almost "buzzing" motion with your wrists.

Adding a word of caution: If you decide to experiment with this method of texturing (or any type of chainsaw carving) I strongly suggest that you first receive professional instruction. I spent 2 weeks in 1995 under close supervised personal chainsaw instruction with professional log home builder Don Chapman from Laurel Fork, Virginia and that has made all the difference. All chainsaw carving can be extremely dangerous if you don't understand how to handle the saw under certain situations because all wood sculpting requires the use of the blades tip which makes the danger of kickback very likely if you're not completely focused on what you're doing. Texturing hair, beard, fur, or feathers requires using the tip of the blade so learn to do it right and never-ever compromise your safety!

I don't have a detail chainsaw with the beloved dime tip so after roughing out the general shape of the spirit I then took it inside the shop to finish up the face with my regular carving tools. The picture to the right is the small 13" acorn-head stick that I carved earlier this year used as a general guide while carving the bigger one.

This was certainly a fun project and I ended up naming him "Keebler" after, of course, the famous cookie making people. Keebler is now looking for a loving home, preferably with kids and lots of pets so that he can be sure to get the kind of love that he deserves!

Thursday, September 3, 2009

WIP- Part 2 (Final): Chainsaw Carved Bear

WIP= "work-in-progress"

A new member to the family has finally arrived and yes, it's a BEAR! Actually I finished him a couple of days ago but just now barely found time for posting.

He was a lot of fun to carve and like I mentioned in the first posting of August 27th and found here this was my first attempt to chainsaw a bear holding a sign. The process turned out easier than I had expected but I credit that mostly to being prepared since I had already accomplished this task on smaller hand carved bears cut out with the bandsaw. If there was one piece of dominant advice that I could offer to new chainsaw carvers it would have to be this: If you want to carve a BIG "something" then first master carving a small "something".That step alone will increase your chances of success more than any other factor... in my opinion.

Also, this was my first attempt at finishing a chainsaw bear as a "black" bear. I used a can of Rustoleum brand oil paint which is mainly made for metal but it worked absolutely perfect on the wood. It penetrated the wood just great and I was also surprised at how fast it dried. The look of the paint was final and it didn't need any further gloss or sealer. In the case of black bears I can't imagine acrylic paints working better after seeing the results of the oil paint.

This bear turned out just fine in my opinion and I imagine that most of my bears in the future will be black. Thanks for looking!


Wednesday, September 2, 2009

Gigantic Ladybug!

2009 has been the year that the ladybug has joined my arsenal of woodcarving ideas. With their bright orange wings accented with a look of fantasy with those big black spots, ladybugs have always been my favorite insect. It has always amazed me how something so small could be so strikingly beautiful. So far I've carved two ladybug walking sticks and I imagine that now they will always have a place in my carving.

So now I decided to go "gigantic" with my favorite insect thus pulling out the chainsaw and a nice chunk of yellow pine that I've had in storage since last year at this time. As the picture on the left indicates I first sketched out the general outline of the bug on the log with a felt marker, then
FortalezaImage by Gustavo (lu7frb) via Flickr
began to rough it out with the chainsaw. I removed all the bark from the log last year so that the "real" bugs wouldn't have a chance to find a good nesting site thus destroying my future chainsaw sculpting wood. Over the last year the thin outer crust of wood took on a weathered gray look so I buzzed over it quickly with the chainsaw bar to return that fresh wood look.

After doing all that I could with the chainsaw I cut the log in half leaving the final carving at about 20" tall since that particular size would seem best for sitting her on the porch or in the garden. Keeping the log long did make it easier for sculping but now it was time to bring her inside for the final shaping, sanding, and finishing.
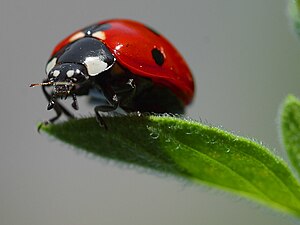
A ladybug standing on a leaf. Photograph taken...Image via Wikipedia

Inside I then took my belt sander and rounded up the wings to a smooth finish then took it to an even smoother sheen with the palm sander. I then lightly ran over the exterior log area with the palm sander to give it just a touch of smoothness. I finished up with a coating of "honey brown" oil stain on the log portion then used full strength acrylics for the orange, black, and white colors of the ladybug. A gloss polyurethane on the bug finished it up.

All in all I'm very satisfied with the final carving and I'm sure that it will soon find a nice friendly home where it will crack a big smile on many a face.

Thursday, August 27, 2009

WIP- Part 1: Chainsaw Carved Bear

WIP= "work-in-progress"

I know that I've got a lot of "works-in-progress" at the moment but I suppose that having a lot of irons in the fire is just the way that I'm wired. So thus, I now present my latest carving which is a small bear. This little cutie will be up for auction at our camps annual fall fundraiser so I'll probably be positing a lot more projects between now and then if you'd like to see what's "in the fire" from time to time.

This afternoon I had a good full hour to sneak in some carving and as the above pictures indicate I managed to get the bear roughed-out and prepped for further detailing whenever I can get back to him. I used a Husqvarna 16" chainsaw but will scale down to a much smaller saw for the detail, then finish up with my carving knives for the super fine detailing.

I've been chainsawing bears for several years now but this little fellow brings a couple of new challenges. As seen in the pictures above this bear is holding up a sign where I will engrave a cute little message (yet to be revealed). This was actually an idea that I gleaned from one of my students this spring when he requested a rough-out for a small bear holding a sign for one of my afternoon woodcarving sessions. I've chainsawed one bear several years ago where I attached a sign separately but never before have I attempted to carve it from the solid log itself.... until now. I figured out how to do it on a small bear first for my carving student, then cut it out on the bandsaw. This method of bear carving soon became popular with many students requesting the rough-outs so I couldn't see why I couldn't do it with a BIG bear using the chainsaw. Thus far I'm quite satisfied with the results and am anxious to get back to it.

The second challenge that I'm presently contemplating is making this a black bear. Before I've always gone with an oil cedar stain (and I still might again) but I'm kicking the idea around in my head right now. I'll need to do a little further research with my friends in the chainsaw carving chat rooms so I'll let you know what I eventually decide. Black bears are what we have living in the forests of the southern Appalachians so black sounds right to me.

Well, that's it for now and I'll post more progress as the project proceeds, but don't be surprised if a couple more works-in-progress' pop up beforehand. Hey! It's just the way that I'm wired! :) Thanks for browsing around the blog.

Sunday, July 26, 2009

Totem Pole Is Finally Retired... but not forgotten (RIP:1997-2009)

Gone but not forgotten is all that I can come up with eleven years later after I carved this 12' totem pole for our mountain camp near Hendersonville, North Carolina. During Thanksgiving of 1997 I was asked to carve a totem pole that would overlook a huge mountain top lake about 100 yards forward. I used a nice pine pole that we had hauled more than half way across the state from Vance county just north of Raleigh so I was careful to get all the carving right the first time around.

The camp director wanted to have a thunderbird on top followed by a frog, an owl, then a bear on the bottom. Their staff came up with an interesting story about their camp that went along with these characters but I personally have since forgotten. Working on the porch of the dining hall I spent about a week carving the pole, then at least another week constructing the wings from laminated pressure treated lumber. Finally the time came to get the tractor and lift it into its resting spot with a long piece of 4" galvanized pipe attached to the rear side, then sunk into about 4' of concrete.

Unfortunately this camp closed it's doors on July 1st and they shipped those magnificent wings back to me as that was the only part of the totem pole that survived the test of time. I suppose that pressure treated lumber has its advantages. The pine pole itself had finally deteriorated far beyond the point of saving but those wings appear to have many years of service left in them so perhaps there will be another life for them some day.

Anyhow, I thought that I'd post some pictures of this grand pole during its hey-day in glory several years ago. Yes it is gone, but not forgotten.