Showing posts with label walking stick. Show all posts

Wednesday, April 28, 2010

Woodspirit in Poplar Walking Sticks

Nothing too special here... or at least to me; just two new woodspirit walking sticks. Just recently two such sticks were requested so I've been working on them, here and there, for the last couple of weeks when I can find the time.

Although this woodspirit is my "generic" brand when carving walking sticks, the reason that I decided to post it here is that it's the first time I've used tulip poplar for an order. I've been using these particular sticks when teaching the kids in my woodshop and Scout classes to carve, but until now I've shied away from them in favor of the harder maple, dogwood, sourwood, or sweet birch. These poplar sticks are super plentiful on our side of the mountain and the dried limbs fall out of the tall trees during the frequent winds storms that come our way.
These two sticks were super solid and didn't bear any of the seasoning cracks that poplar so often produces so I decided to use them. Although most poplar sticks don't meet my standards when an order is given, these two sticks did. I especially love the way that poplar takes on the paint and finish with such a bold look that almost jumps at you. The final antique wash sets in excellent with poplar producing the greatest dark/light contrasting that you could hope for. I love using poplar for my walking sticks but it's more the exception than the rule.

As you can see I also painted on five animal tracks below the woodspirit which gives the stick a great compliment to the carving. I hope that the new owner enjoys them as much as I have in carving them.

Friday, March 12, 2010

WIP: Scrap Stick Bill Is Now "Fat Lips Bill" (Part 3- Final)

 WIP= "Work in Progress"

Bill is now finally finished and what a fine old chap he is! After finishing and studying his face for a day, I've now decided that Bill has been given the behind-his-back name of "Fat Lips Bill" by the hard working crew that he manages at an auto mechanics business.

Bill is the boss and he's got a quick (and quite intelligent) come-back to just about any sarcastic remark that comes his way. He's mostly fair, loud, smart, funny, no-nonsense when it comes to getting the job done right, and everyone realizes that he's the best man for the job of boss. But like any workplace setting the undercurrent still exists among the workers because that's just what employees do.

Yes, Bill's lips are a bit large but as the boss that's an attribute to his advantage because when he's throwing out direction in a very loud mechanics garage a bull horn isn't necessary. People hear Bill immediately and right after a quirky jerk of the neck to face the direction of his vibrant voice, those workers literally jump onto the job at hand without a whimper. Joke as they might about his big fat lips, Bill takes good care of his people because production is always far over and above expectations. Bill is a good man at heart and he pays his people very good for their hard work.


I used watered down acrylic paints to finish Bill and the rhododendron wood always takes on the finish well. The cigar was also made from a dry rhododendron twig that I cut off the undergrowth of a healthy mountain bush just a few days ago and I set it into his mouth by first drilling a 3/8" deep hole then applied wood glue for a firm grip. Bill was a really fun project and he's earned a nice spot on the nik-nak shelf but I sure do wish that he'd brush his teeth!

Wednesday, March 10, 2010

WIP: Scrap Stick Bill (Part 2)

WIP= "Work in Progress"

Today I finally had a good opportunity to finish carving ole Bill and now all that I have left is the painting and finishing job. Just when I thought that I had exhaused every new idea something new always seems to pop up with each new carving and "Bill" was no exception. His hair is carved with it combed straight back over his head and I don't know why I've never thought of trying this before because it was amazingly simple... really easy!


From the top of the forehead I just carved in a "wave" outward then straight back into the wood. I really like this look and know that it will now become a regular hair style with my face carving. Heck, maybe I'll just go ahead and carve Elvis himself since after all, I think that I did see him running in the woods last week. :) I also decided to put a cigar in his mouth so he's looking like a classic blue collar guy to me. I should have him finished soon.

Monday, March 1, 2010

WIP: Scrap Stick Bill (Part 1)

WIP= "Work in Progress"

With more snow in the forecast for tomorrow and this being the coldest, snowiest winter in many years I'm a little bit surprised that the carving bug is continuing to bite me. But that's just how it is right now so I'm not going to fight it... just give in and milk it for what it's worth... or until the carving doldrums set in, but hopefully not.

After the little face in my last posting I've decided to continue carving in the small face category and I'm using the larger end of the same rhododendron stick that I used in the last carving. That particular stick was well cured and a left over from last falls auction, a walking stick. That means that I cut it over a year ago and there was no precious moisture left in it's veins so carving it is a bit on the tough side. If you're new to carving then I'd strongly reccomend sticking with basswood if you want cured wood but I've been at it for many years and my hand/finger muscles are well developed for this task.


From the pictures you can see the progress that I made Sunday and I didn't get a chance to work on him today. As usual, I started out my face by roughing out the nose and eye-wells first. From there I could then decide on how puffy the cheeks would be. With a full-toothed smile I suppose that I'll have to try and get the cheeks a bit more rounded than usual but I'll just have to see what I can do with this thin 1-1/2" diameter stick.

After seeing those teeth come to life it immediately hit me that he would from this point forward be know as "Scrap Stick Bill". Naming my carvings makes it a little bit personal and seems to make me try a little harder. You know how that goes when it comes to naming your newest dog... there's just no turning back because a name makes him "family" from that point forward. Some say that I'm somewhat demented when it comes to things like this but the way I see it I first have to adopt something before I will treat it with the respect that it deserves.

...And hopefully "Scrap Stick Bill" will soon sit proudly beside his other stick friends where he will bring a new smile to all those who kick up the dust around his parts.

Friday, February 26, 2010

Scrap Walking Stick Creations

About two years ago I began carving faces, flowers, and bugs on the scrap pieces of wood that I cut off my walking sticks. For years I looked at those nice pieces of wood... some sourwood, rhododendron, or perhaps dogwood and just didn't feel right about tossing them out or into the wood heater. Even though they had been cast as walking stick rejects, for some reason I just loved these little pieces of finely cured wood so I gradually ended up with a fine reserve of the best pieces.

I might have already posted one of the greenmen here as seen in the picture above and now I'm back at it again! These little pieces of wood are just too beautiful and most of all they are just too easy to pick up and put into my cargo pockets when I'm leaving the house. During the day I can then work on them whenever I can find a minute or two.

These little "on the go" carvings are mostly unplanned so I use complete "on the spot" creative freedom in their woody creation. As seen in the other pictures I just finished another scrap wood face this week, just working on him when I could. He is made from a piece of rhododendron that is about 6" long and 1-1/2" diameter which is my ideal walking stick thickness.

While this particular little face is quite simple I was influenced from several references while carving it. Most of all I had just watched the movie Avatar the day before I began carving so that's probably where the look of something from The Planet of The Apes crossed with Star Trek's "Spock" came in. I even added some lavender skin tone to the final finish but it's hard to see from a picture.

Although he's not too complex when it comes to carving, this little fellow will make a nice addition to the "family" as I decide what the next one will be.

Sunday, November 29, 2009

WIP: A Thanksgiving Woodspirit Marathon (Part 2-conclusion)


Thanksgiving has afforded me with the addition of four new members to my woodspirit family. They are now finished and ready for duty in the hands of new owners as they will surely explore many new trails. Two of the sticks have some really nice swirls at the top near the handle on the woodspirit beards which make them quite unique and that also makes them feel good in the palm of the gripping hand.


The animal tracks also turned out nice and bold which compliments the woodspirits just right. Over the years I have developed several sets of animal tracks for placing on my walking sticks since most folks request them. I developed their designs from several sources including a large track collection that I have casted over many years in the field. I've also studied numerous tracking books where I've gleaned many other variations of how a particular animal leaves his print in the sand, mud, dirt, and sometimes the track is left wet as the animal steps from the edge of a stream to a rock surface. Animal tracking has been one of my fondest hobbies since I was a child so I am always learning more about what the trails of a wild animal can teach me.

Friday, November 27, 2009

WIP: A Thanksgiving Woodspirit Marathon (Part 1)


 WIP= "Work in progress"

Thanksgiving was a little different this year as I have been engaged in a planned carving marathon to produce 4 premium sourwood woodspirit walking sticks. I chose the wood from my best drying stock and these four sticks were cut last March giving them an approximate drying time of about 8 months.

The pictures on the left show the sticks just after the initial roughing-out phase which is my method for starting all of my walking sticks. During this phase I first cut the stick to 58" long then lightly sand the bark then seal everything with as thin a layer of polyurethane that  I can possibly rub on.

Next the stick goes in the vise where I use my larger carving tools and mallet to rough-out the basic face features and hair. As the photos to the left indicate this leaves nothing much more than eye wells, a square nose & forehead but you get the point.


From this point forward I can then manage the remainder of the carving with the stick in my hands while using my smaller palm carving tools to develop and to refine the details. Some folks seem to be quite successful carving the entire stick while held in the vise but after the roughing out I like to carve them in my hands where I do a considerable bit of flipping, turning, and other acrobatic-like maneuvers to get the effect that I like. I suppose that the correct method of carving is doing whatever works best for you.

The picture to the right is the progress made up to this point and the woodspirit faces are now ready for a finish. As you can see I am also putting on a strip of five animal tracks just below the faces which has become the norm for my spirit sticks during the last 5 or 6 years. At this point I only have them sketched out on a portion of the stick that I cleared of bark using the shaving horse, then sanding to a fine finish. The tracks on this series of sticks include bobcat, raccoon, opossum, skunk, mink, beaver, muskrat, coyote, red & grey fox, whitetail deer, and black bear. It takes a lot of focus to paint the tracks onto the stick with black acrylic paint but the end result after a polyurethane glossing is a stunning compliment to the woodspirit face.

I will post the completed sticks just as soon as they're finished. Meantime, have a great Thanksgiving.

Sunday, October 18, 2009

Bald Headed Woodspirit Walking Stick


Here's another very popular walking stick that I've been carving pretty regularly for about five years now. This type of woodspirit adds a somewhat much fuller "3-D" face that extends around all sides of the stick top. The top few inches of this sourwood stick were slightly twisted and thus added an additional nice
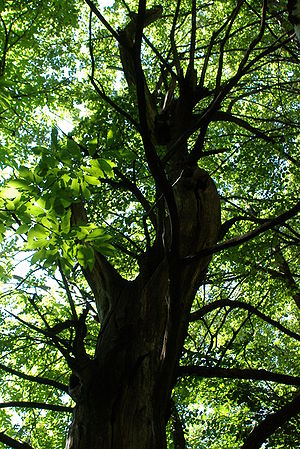
A :en:sweet chestnut forest in the swiss alps(...Image via Wikipedia
look to the woodspirit face.

Carving a more complete face on the top of a walking stick does add an exciting new challenge especially if you're accustomed to the one-sided woodspirit faces. Attempting the the full head will take your carving to the next level so go ahead and give it a try! In doing so I would first suggest that you do a search and study some bald heads and especially look at the rear side where the skull dips back to the inside toward the back and shoulders.

The stick ended up bringing in $44.00 at our annual fundraiser auction in September so the money went to a good cause and I also know that "Baldy" has a new good home for many years to come.

Saturday, October 10, 2009

Carving a Hippy Walking Stick


I still have quite a few carvings that I haven't had time for posting but I'm getting them up as fast as time allows. The video above is about a hippy walking stick that I carved a month ago for our annual fundraiser auction and fierce bidding to the very last seconds brought in $65.00 from the new owner.

I've carved tons of woodspirit and Indian walking sticks over the years but suddenly this idea to
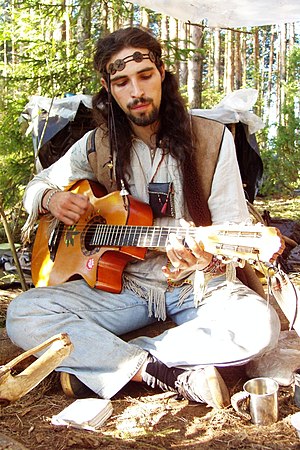
Russian Rainbow Gathering.Image via Wikipedia
carve a hippy walking stick hit me and what a lot of fun that it ended up becoming! The further the carving went along the more hilarious that it seemed to get as you can see from the colored bead necklace and the love beads that I added to the wrist strap.


Other than the idea to carve a "hippy" this is one of those projects that sort of invented itself and my carving hands just happened to be there for the ride. :) I used a nice red maple stick that I'd been curing for about 8 months and it was a pure pleasure to carve. Usually I opt to remove the bark from maple but it showed every sign of being very firmly attached so I left it on although when doing so I always lightly sand it with 220 grit, steel wool, then I rub in a very thin coating of polyurethane and shine it up "wet" until it leaves the bark with a very desirable flat luster of a shine. The new owner of the stick expressed the utmost satisfaction from how I'd applied the finish and wondered how I did it.


I finished the hippy with thinned acrylic paints that were carefully layered with Krylon acrylic
sealer. I'll be making more of these in the future!

Reblog this post [with Zemanta]

Thursday, September 17, 2009

Another Indian Walking Stick- (Black Birch)

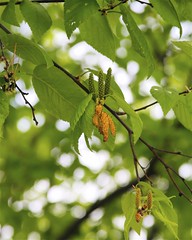
Sweet Birch Catkins (Male & Female)Image by milesizz via Flickr
Lately I've been on a roll and I'm turning out a LOT of carvings. That's due mainly to two major fund raising auctions that both land in September. The Indian walking stick that is posted to the left is different from the one that I posted on September 11th here but just as nice in my opinionated opinion. (Ha)

On this Indian I put a turquoise and red headband in place which gives it his distinctive Indian appeal. I used a nice piece of sweet birch that I cut less than a year ago so it carved quite nicely. Some folks call it black (or cherry) birch which are also correct.

Within the month it will soon find space for show and tell in a yet to be know home where I hope it can be enjoyed for many years.

Reblog this post [with Zemanta]

Friday, September 11, 2009

Latest Indian Walking Stick


I just uploaded my latest YouTube video on carving an Indian walking stick. While I don't claim to be a professional face carver, I thought that I'd put together the general steps in how I've come to carve a basic Indian face, hoping that it will inspire a new carver to stick with it until they are satisfied with their own work.

I used a 58" piece of straight sourwood that I cut about six months ago. The stick was very dry but not 100 percent seasoned, leaving just a touch of moisture for MUCH easier and enjoyable carving.

Carving an Indian face presents a very nice challenge since you can't hide details like the mouth and chin as can be done with all the hair & beard on a woodspirit face. For new carvers I would suggest mastering the basic woodspirit face first, then gradually progress to the more challenging details found on the Indian. But if you feel bold or like you're ready for this kind of challenge then by all means, "Go for it". In getting started the basic principle that I always keep in mind is to carve the eyes and nose first, then base everything else around that.


With the carving done I pained him with a variety of mostly watered down acrylic paints but that process would take another video. I put on a final sealer of polyurethane, then drilled a small hole just below the hair for a leather wrist strap. I also carved the name of my Order of the Arrow "Lodge 118" down the front of the stick since it will be auctioned by the Boy Scouts this fall as part of a fundraiser for our troop. Happy carving!

Sunday, August 9, 2009

Ladybug Walking Stick # 2

Lots of folks really liked the ladybug walking stick that I carved a couple of months ago and the original post can be found here. I therefore decided to carve another one similar to the first for our September fundraiser auction. I think that the legs on this one were just a tad longer so I'm calling her my "daddy long-leg" ladybug.

Tuesday, June 9, 2009

WIP Part 3-Ladybug walking stick

The ladybug gets a couple of green leaves


I finally managed to get a couple of green oak leaves carved just below the ladybug and I think that the greenery compliments the orange well and she now feels a little more at home perching there on top of the stick. The pictures are quite explanatory but I first made a rough sketch of the leaves, one on the front and one on the back, then went on to create a raised relief carving. Instead of just laying them straight on the wood I decided that they would be more interesting if I sketched them in a slightly arched manner and sort of like the McDonald's golden arches. I think that they look a little more humble and have a more 'floating in air' look to them like this.

I have now begun carving a slightly textured handle area just below the leaves in a swirled fashion resembling a Christmas candy cane. Not sure how I will color this area just yet but most likely it'll be an earth tone. I have also begun carving a woodspirt just under the handle and that's probably where I'll end this project. More later and thanks for looking.

Thursday, June 4, 2009

WIP: Part 2-Ladybug walking stick

She's a pretty little bug


I've finally completed this cute little ladybug and for such a small carving she really does stand out atop the stick boasting that coat of orange and black! This is a walking stick that I've had on my mind for a very long time and I'm pleased with how it came out. It's actually a fairly simple thing to carve and I would have to put it in the fairly easy category if teaching a new student to carve one.

If you don't have much carving experience my tips for this project would be to first study as many pictures of the ladybug as you can AND study the real bug in the wild too if you can. As you can see from the pictures that I added to the last posting, sketch out the general rounded body shape on the top of the stick before any carving begins. Most of my new carving students biggest mistake is picking up their piece of wood then they will begin cutting it with their knife with absolutely no sketching, or outline of their project on the wood and then they will wonder why they can't get it right. All good carvers will do at least a rough sketching of their project on the wood first. The next tip that I will recommend is to scribble a general center line if you are carving a 3-D project such as the ladybug. I find that having a center line is essential as a reference point for keeping both sides of the carving in their proper perspective.

For the paint job I used water based acrylics and thinned them down a good bit then, as usual, applied several layers until I reached the tone I wanted. For the base coat I mixed a bright red with a pumpkin orange that seemed to make up the real ladybug color. After painting the legs and spots with black I quickly dried it with my hair dryer then very lightly sanded the finish which I feel highlights the hand carved markings just beautifully. Gosh, I do want it to look like a wood carving and not like the smooth painted finish of a new car.

The next step now will be to carve those green leaves under the ladybug which I believe will contrast well with the bright orange and bring my bug to life. I'll try and get those pictures posted by the weekend. Hope that you like my new little buggy friend!


Tuesday, June 2, 2009

WIP: Part 1-Ladybug walking stick

Last weekend I pulled down a fine red maple stick that's been curing in the shed for more than 5 years so it was well seasoned and begging to be carved. It was one of my smaller sticks measuring 56" tall but only 1" diameter at the top. As more carving years roll off behind me I seem to be carving small things more and more. Perhaps it's an effort to perfect my micro carving skills or since I'm getting older perhaps it's just my attempt to better understand the intricacies of my own life and how I fit into it. Whatever the reason this project is going to be another one of my efforts to better understand carving in the small.

For beginners I knew that I wanted to perch a brightly colored ladybug on the top of my stick and at some point I'd like to do one with a frog ready to jump, but today it will be the sweet little ladybug and I'll have to save the frog for a rainy day. Gosh, who can deny the intrinsic beauty of that rounded coat of orange and black spots? Ladybugs have always captivated my imagination and scientists also say that they are very beneficial to agriculture but they also have a dark side. Each spring they find their way into my old house by the hundreds (possibly thousands?) thus a battle of the bugs begin. I swat them from the ceiling with my broom, spray them in the windows in a desperate effort to control the madness, and occasionally I spit them from my mouth while eating my cereal... but I always get through it and survive another day. Yes, they can be darn pests' also!

If you enlarge the picture above by clicking on it you will better see how I first sketched an outline of the ladybug on the top of my stick with a pencil, then began removing the waste wood with my jack knife using a repeated stop cut and push cut. Right from the beginning there was no doubt that this piece of well seasoned red maple was some kind of hard. Sometimes I love carving into the harder woods because it slows down my cuts to a crawl forcing me to just enjoy the carving process on a higher level and the slower cuts slow down my mistakes giving me more time to contemplate each cut. For some reason I find a deep satisfaction from this kind of carving.

After rounding the body and adding the legs I just lightly sanded the rough carving with a piece of fine grit 220 sandpaper but not too much as I want the beauty of the cut wood to show. Next I will add the finer details of the ladybug and that's where all of the pictures of this beautiful little insect come in handy. I've been collecting pictures of ladybugs for many years and have a nice collection to study so I'll now try and get those wings, eyes, and spots embedded just right. So far I like how it's turning out and I'll post the next update soon which will include the paint work and perhaps I'll add something else to the stick. Maybe a few green leaves would be nice underneath this ladybug? We'll see.