Showing posts with label wood carving. Show all posts

Sunday, November 21, 2010

Add Accent to DreamCatcher With Woodcarving

With Christmas just around the corner I've been spending some time making gifts with a special concentration on  dreamcatchers.  From my research I learned that dreamcatchers originated in the Ojibwa Indian nation. Kids love making these unique natural crafts that can be hung over their bed to filter bad dreams out, thus opening up a gateway of happy visions.

I began weaving Indian dreamcatchers 3 or 4 years ago and  I use real animal sinew for weaving the "catcher" inside a small wreath  of bitter/sweet vine that I twisted into a circular form. I've found that it's much better to form the vines into shape and dry thoroughly for several months before weaving... otherwise the sinew will become loose as the vine dries.

When I began making these unique crafts I knew that I had to find a way to add woodcarving to the project for the perfect accent thus making each dreamcatcher truly a "one of a kind".
 In the dreamcatcher pictured here I decided to carve the Boy Scout "Order of the Arrow" into a thin piece of basswood. I then drilled two tiny holes into the wood so that I could weave it securely to the sinew webbing. I applied a tiny amount of hot glue to the tied ends of the sinew to prevent any chance of unraveling. I found the three black crow feathers from my summer walks into the woods. Have fun and be safe!

Monday, August 30, 2010

WIP: Forked Branch Carving: Meet "Da Wiz" (Part 2 of 2)

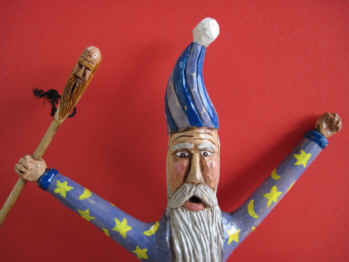
The 'wiz' is now carved, painted, finished, and now standing its ground on the nik-nak shelf. I liked carving this project because I had only limited control over how I would shape the body since that was already pre-determined by the forked-branch limb itself. A block of basswood can be shaped pretty much into any shape preferred but not so for this kind of branch carving. It adds a neat new challenge to carving that I like to tackle on occasion.
As seen in the pictures I decided to use a watered down variety of acrylic paint to the point where it was applied more like stain rather than paint. I did apply the yellow stars in full strength color which was necessary to get the right contrasting against the light purple clothing. Looking back, I suppose that it wouldn't have taken much alteration in design and finishing colors to make this a Santa then perhaps the woodspirit staff could have been his reindeer whip... Just a little brainstorming :-)
As for attaching the wizards staff I first drilled a 1/8" hole straight through his right hand as seen in the picture above. This is something that needs to be planned before carving the hand which will grasp the staff because the necessary room must be allowed for the addition. I then went on to use a 1/8" piece of dowel rod for the staff then I drilled a small hole into another 'slightly larger' piece of dowel rod and glued them together as seen above.
As seen above I then carved a simple woodspirit face into the upper part of the inflated staff which compliments the wizard and makes the carving much more interesting. I glued the staff permanently into the hand and then drilled a super small hole for a small nylon wrist strap dangling from the staff.


This has been a super fun carving project and I'm sure that forked-branch carving will continue to have a place in my yearly carving endeavors.

If you would like to see 28 higher quality pictures of this project from beginning to end then just click here for my Facebook album on the 'Wiz'.

Thursday, August 26, 2010

My 2010 Chainsaw Black Bear

I usually only chainsaw carve one bear every year as part of our camp fundraiser effort. Here's this years bear that I just completed yesterday that was cut from a yellow pine log measuring about 40" tall and 12" diameter. The 'actual' bear is about 29" tall.

Like last year's bear I used Rustoleum oil based paint for the main color which I mixed with about 40 percent paint thinner. I love these oil based paints which penetrate the wood like nothing else can. If you'd like to see more of the entire carving process I have uploaded 40 quality pictures here which is a public address that anyone can access.

Wednesday, August 18, 2010

WIP: Forked Branch Carving: Meet "Da Wiz" (Part 1 of 2)

WIP= "Work in Progress"
Just a few days ago I posted a short series about my experiences with "forked branch carving" and it was so enjoyable I thought that I'd share my most recent endeavors into this unique kind of carving. The best part is that you don't need an expensive piece of basswood to get started. Instead, this kind of carving provides you with the perfect excuse to get out of the house and into the woods to find a good forked branch suitable for your project.


Of course the first thing that you'll need is a forked-branch. As seen in the picture to the left I found a small red maple tree that had fallen in a recent wind storm. I'd been watching it along the trail for several months until the leaves had browned and the wood had become relatively dry. I cut off the portion of the branch that suited me and sat it inside the woodshop for a couple more weeks just to see if it was going to start cracking. Finally I was confident that it would be a good piece of wood for carving.
As seen above I first prepped the stick using the bandsaw to put a little curve into the top part where I wanted to carve the wizards tall, pointed hat. I then went on to begin shaping the face.

With the face and hat finished I then went on to carve the old mans beard and hands. I found a nice piece of river birch under the table counter that was left over from an earlier lathe project that I used for the base as seen in the picture to the right. I just carved the end of the wizard stick to fit nice and tight into the stand, applied some wood glue, then secured a tight fit.

Ahhhhh, all done... except for the light sanding and paint job which I'll post soon. I'll also show some pictures about how I carved and attached the little tiny woodspirit walking stick into his right hand.

Saturday, August 14, 2010

Ilsa: The Wicked She-Witch (Cypress Knee Carving)


 It's been a while since I've driven my knives into a cypress knee but lately I've had the urge to pick up a couple of them. The first project "Swamp Man Sam" can be found a couple of postings back here.

As seen in the pictures to the left you can now meet Ilsa, the wicked she-witch which is from a small 11" tall cypress knee.
In the beginning I had no idea that it would become a green faced witch because it started out as a woodspirit face. Not only was it intended to be a woodspirit but this particular cypress knee was given to me a year ago by another carver who thought that he'd messed it up and I tended to agree. He was hoping that I could somehow save it but I didn't have time to work with it at the moment.

That time finally came last week when I picked it up again. The eye-wells were deeper that I would have preferred and the mouth was offset a bit. From the pictures to the right you can see where I began to enclose the face thus defining some shape into it.

Yes, it was well on it's way to being a woodspirit face but while having lunch one afternoon with one of my woodshop groups, one particular kid said that he saw the makings of a witch more so than a woodspirit so that caused me to study the shape and lumps of the wood a little closer as I began to agree. I then began transforming the mouth area into an uglier and toothless witch-friendly look and chip by chip the idea took hold. I cut in a lot of wrinkles on the forehead and lower face then completed "Ilsa" with a fine bulging mold on her chin. I then shaped up her tall pointed witch hat by using the natural shape of the cypress knee.

Ilsa has been another fun woodcarving project. Not only fun but this has been one of those carvings that sort-of found itself. It began with an effort to save another carvers failed attempt, then it was enhanced by one of my students ideas. The lesson here is to never look at any carving as "lost" but instead as an opportunity to see what you can still find in it. Open up you senses, your mind, and ask those around you for ideas. It's amazing what you'll come up with sometimes.

Wednesday, August 11, 2010

WIP: Forked Branch Carving: Meet "Herbert Sherbert" (Part 2 of 2)


WIP= "Work in Progress"

 Herbert is now finished and standing his ground proudly wherever I decide that he will stand. As previously mentioned in part 1 of this carving, it was one of my funnest projects ever. In the past I have dabbled with forked-branch carving but this particular project has taken my curiosity to the next level, which as a carver, has always been an ongoing goal.

Note in the pictures above the "Popeye" forearms of Herbert. That is just one of the wonderful effects that I was able to achieve by using the mortise and tenon joinery. The bulging eyes, nose, and ears also benefited from this method of carving by attaching various parts of the carving with joinery. I thought about adding a ball cap on Herbert's head which would have added additional joinery but decided that I'd rather have all of his bright green hair showing. After all that's why he was named "Herbert Sherbert".

In the pictures directly above I give you an idea about how I carved the hands for Herbert. I used a small limb of rhododendron, carving one hand on each end of the stick. Keeping the hands on one single long stick made the carving much easier with the natural "handle" then I cut them to size when done.
Since the body of Herbert didn't come with forked limbs for the legs I had to attach them separately as seen in the picture to the right. Once again I drilled a mortise into his body then a tenon on the "legs" section. I also decided not to apply wood glue to this joint since it fitted so squeaky tight and most of all I discovered a nice surprise. I found that putting the mortise hole close to my lips and blowing air at an angle across the surface I had a very loud whistle. That was just too cool for hiding in a permanent joint so Herbert's legs can now be removed at will to amuse folks with the bonus whistle. Sweet!

I finished up Herbert with watered down acrylic paints (including an American flag belt buckle) then applied a rub-on polyurethane. Forked branch carving has now become a regular part of my daily carvings and more interesting creations will follow in the days ahead so stay tuned.

Saturday, August 7, 2010

WIP: Forked Branch Carving: Meet "Herbert Sherbert" (Part 1 of 2)

WIP= "Work in Progress"

Here's one of the funnest little projects that I've worked on this year and it's been "ongoing" for a full month now. Thank goodness it's almost finished and the picture to the left shows exactly where I am with it right now.

What is it you ask? Good question because I've completely made it up as I went and this little fellow has evolved into quite the character. For beginners his name is "Herbert Sherbert" because I was looking for something to rhyme with Herbert when one of the kids suggested "Sherbet" and to paint his hair a bright and crazy color. I wanted Herbert to be a bright, happy, and cheerful fellow so that name sounded good to me.

I began this little mortise & tenon carving project by first cutting a nice three-prong rhododendron branch that was well seasoned. As seen in the pictures to the right those two outer branches looked like outstretched arms to me and that's all that my mind needed to get going. The center branch was a bit too narrow to make a good head so I decided to strip the outer bark away then made the stem perfectly round. I was thinking that I could use it as a tenon to hold an enlarged head securely in place.

As the pictures just below show, I then used a 1" diameter maple branch for the head by first drilling a 3/8" mortise which would tightly fit my tenon. With a little wood glue I then placed it onto the body for a snug fit.


 After the head was securely attached I then went on to drill the holes for the eyes, nose, and ears. I'll post the remaining photos and the finished "Herbert Sherbert" just as soon as I can finish him.

Wednesday, August 4, 2010

WIP: Indian From Core Of Red Cedar (part 2 of 2)

WIP="Work in Progress"
A few weeks ago I began carving an Indian warrior inside a very nice piece of eastern red cedar where part one can be found here. I carried it around everywhere I went for several days and continued carving on it whenever I could.

As you can see from the picture to the right as it sits on the steps of my house this warrior is now finished. Standing 9" tall with a 2" diameter it isn't too overwhelming and will draw just the right amount of attention from its place on the showcase shelf where it will remain, unless... someone pulls out a hundred dollar bill. (Ha) Don't laugh too hard because that's exactly what happened about ten years ago when I finished a very similarly carved Indian in a piece of red cedar. I told the kind lady that it wasn't for sale because I really liked it and wanted to hang on to it. She then proceeded to pull out a one hundred dollar bill when I then told her that I could "learn" to live without it.


 The carving went very well as red cedar is mostly a pleasure to carve. I used my Flexcut Carvin' Jack the most but I resorted to my macro tools for some of the finer detailing and hard to reach areas.

When the Indian was finished I then decided to add a Thunderbird just above his head as seen in the pictures to the left. This was a simple and very shallow low-relief carving because I wanted only the creamy white "surface" wood to show. I then went on to burn in some outlining of the design then added some very watered down acrylic paints for a touch of color.


The final finish consisted of a light sanding then a couple coats of gloss polyurethane. Only the face of the Indian, the Thunderbird, and the very top of the wood received the high gloss. I only hand rubbed a dull polyurethane finish into the surrounding wood for a "complete" seal and a nice contrast.

This one's not for sale at any price!
Well.......maybe I'll think about it if some kind soul just happens to pull out a hundred dollar bill. :)

Monday, August 2, 2010

Learning To Carve: My Story

Learning to carve takes me back several decades when I was in elementary school. Remember those kid's in 4th, 5th, and 6th grade who were "revered" for their ability to draw great pictures during art class? Besides producing great pictures they always got special recognition from the teacher and everyone in the class. Even more than producing great art I believe that I envied their positive attention which became a motivator. Kids are no different today where positive attention for excellent work is a very strong motivation to succeed.

I noticed that the kid's (usually only one in the class) who produced that great art were the one's who were always drawing. I'm talking all the time. One kid named Dan Roper especially comes to mind. They had the best decorated 3-ring binder notebooks, they doodled during class... they were always drawing on request for everyone and it seemed like the pencil was glued to their hand at every opportune moment.

I believe that this early experience taught me that the only way to get better at something was to do it all the time. To get better I know that I have to carve something every single day. That's the reason I wear pants with cargo pockets so that I can have a small project with me 24/7... OK, I do take my pants off for bedtime, but they're only 3 feet away at any given moment. My Carvin' Jack (by FlexCut) is also always on my belt loop so I’m always on “go”.
Back in the early 1990's I wanted to stretch my ability to the next level so I became obsessed with learning to carve face's... mainly woodspirit faces. I literally studied the people around me with a laser beam focus (and I continue to do so today). Whenever I'm talking to someone my brain is also absorbing a lot of information about how their nose is shaped and its relation to their eyes and forehead, the unique form in their lips, their eyes in relation to their nose, etc. I am truly obsessed with learning and EVERYONE is my teacher. I've actually become pretty good at carrying on a conversation while simultaneously absorbing a lot of facial structural information then tucking it away somewhere in my brain for future reference. That's really how I've gotten better at what I do because there's a lot more to it than just reading how-to carving books. You must engage your brain in real life.
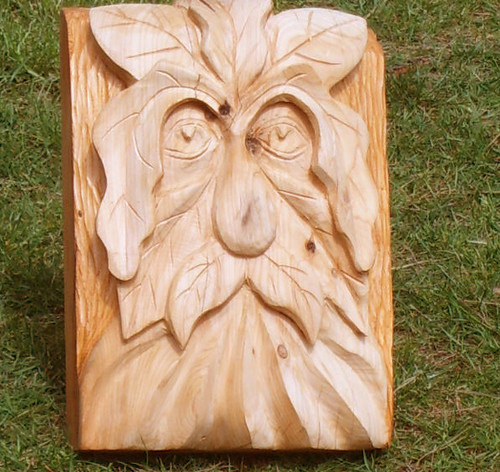
As for woodspirit walking sticks, I recall having to carve over 30 of them before I was finally satisfied with trying to sell them. They weren't bad sticks and I loved them but I still needed to improve. I gave them all away and remember jokingly telling the happy recipient that it was only a "B" stick. But the day came when I was finally satisfied and knew that I deserved to be financially compensated. I continue to refine my own unique brand of carving but I never want to feel like I have "arrived". I continue to be obsessed with learning more and being obsessed has a lot to do with it for me.

 When I successfully hiked 2,565 miles in 2001, Mexico to Canada, on the Pacific Crest Trail I became obsessed with ultra-light camping methods and pack weight reduction. The base weight of my pack was only 9.2 pounds and that's the main reason that I made it all the way in only 109 days. Same goes for learning to carve because you WILL learn how to carve if you become obsessed with learning how and never quit looking for your own answers. If you want something bad enough then you WILL find a way to get there. Several decades ago I wanted to be a good wood carver more than anything so I kept at it almost every single day for years.

Looking back to those early experiences in elementary school I know that I learned a lot about how to obsess myself with learning something new. Then I was motivated by all the positive recognition from teacher's and peer's, but today I am doubly rewarded with extra dollars in sales and even my career has been centered around teaching kid's to carve and work with wood every day in woodshop  and Scouting classes.


So how long did it take me to get what I consider good? All in all I'd have to say that it's been a lifetime experience and that I've always found ways to push myself from one level to the next... AND I always carve something, no matter how simple, every single day! If you do that then you will greatly improve your ability to carve great things tenfold.

Friday, July 30, 2010

And Even More "Hillbilly Pencils"

Sometimes I just can't too much of a good thing and this is one of those moments when it comes to carving hillbilly pencils. Several days ago I posted all the details of how I make them here, but since then I've pumped out a few more that I thought I'd share.

From left to right in the picture to the right is what I consider to be a worm going into the wood on one side then coming out on the other side. Although it's hard to see in the picture I did wood burn a tiny face on him. The next one is the lips and tongue design for the Rolling Stones. That one has become quite popular since it's so bizarre. Oh, and there's that darn roadrunner again. Lastly is a little wizard man with his tall blue hat with a red ball on top.


In the picture to the left are a few of the unpainted pencils from above AND a few more that I'm still working on. One is a rooster and another one is my version of a coo-coo bird.

These easy little pencil carving projects make great gifts or collectibles. Right now I'm already thinking about making a simple display stand to show them off. Perhaps a foot long piece of 2 X 2 would work just fine but I'll probably go with using a straight piece of seasoned tree branch with the bottom planed flat. The natural design would go much better with this rustic wood-themed carving project.

Tuesday, July 27, 2010

Meet "Swamp Man Sam" (A Cypress Knee Project)

Here's a neat little cypress knee that I picked up last week then finished painting it this weekend. It's about 10" tall and these smaller knees are the ones that I like best for carving. It's a convenient size for tucking inside a cargo pocket then pulling it out whenever a moment to carve can be found. Like this one, cypress knees bring birth to some of my most hilarious carvings because you have to go with the wood which is quite a difference from your average "squared" basswood block.

If you look closely there is a little story being told by the carving. Ole Swamp Sam down below has got his swishy tongue ready and his beady eyes fixed on the little purple dotted lizard that is perched just above. It's quite a comical piece which has already brought many smiles. 

As you can see from the pictures above I first tried to take advantage of the knots, bumps, and free-form twists found naturally in the cypress knee. There was nothing planned out with this carving in the beginning and I just let the wood gradually find it's own story. I first began with the mouth where I made use of one "bump" of wood for shaping the tip of the tongue. After adding teeth and lips I then moved up the wood using a twisted section for its funky nose and then of course, those beady eyes. With a bit more thought I got the idea for the lizard and then the complete story came full-circle.

This was a fun carving project and if you haven't yet discovered the joys of carving cypress knees then you're in for a treat.

Saturday, July 24, 2010

WIP: Indian From Core Of Red Cedar (part 1 of 2)

 WIP="Work in Progress"

Eastern red cedar has always been one of my favorite "found" woods for carving. Because of it's sharp contrast in colors between red and white, this is a very appealing wood for making everything from simple carved nameplates to making a jewelry chest. When I was a counselor the kids in my group valued its carving properties so much that they created their own monetary system using the wood as a valued trading item. Needless to say that we had to put a stop to that but it goes to show that eastern red cedar has always been a valued wood for carving.

I just recently re-found the piece of wood used for this project from where it had remained hidden for many years under a woodshop table. During a cleaning mission it was a great find so I decided that I'd put an Indian into it. Looking at the first pictures above you can see what a fantastic center of core red wood that this cedar had... just at the right proportion to white surface wood to make it ideal for an Indian warrior carving. This carving will only require a clear finish when completed because painting it would bring ruin.

For the most part I am very pleased with the results so far. With the Indian finished I then decided to add some supplemental surface carvings around the main carving and the Thunderbird is the first. I was careful not to go too deep because I will later lightly add some hints of color to this one and I only wanted the upper layer of white wood to show. Not sure what I'll do next but I'll let you know when I get there.

Tuesday, July 20, 2010

Woodspirit in Black Locust


During the last couple of days I've had the opportunity to teach a quick woodcarving class on woodspirits. The complete carving took us just a bit over an hour yesterday afternoon then today we put the final stain and finish on it.

I had about 5 students help me with this project and they were fired up and proud to be helping. As you can see in the picture to the right they chose a barkless slit about 2' long and 5" wide in a black locust tree. At first I cringed in serious doubt because locust is one of the hardest woods around our parts and only hickory is probably harder. My head immediately had visions of broken carving knife blades that could cost me as much as $75 each to replace. It's happened to me before so I approached this tree with caution.


As everyone watched in anticipation I made the first few cuts outlining the nose and eye-wells with my v-parting tool. I was very careful and made my cuts very shallow until I could get a feel for this particular tree. As you see by the red circles in the pictures to the left a multitude of creepy crawlers, ants, and bugs were in full military patrol with all the hammering going on upon their tree.


The carving went better than expected and with small calculated cuts I decided that the locust was doable. As several of the surrounding pictures indicate, I allowed  the kids an opportunity to do some of the carving with specific instructions as they enjoyed making the cuts. Carving the beard is not too difficult and a good place for kids to get a feel for the carving. Basically they just tapped the large v-parting tool with the wooden mallet trying to keep a smooth flow of the cuts with no crisscrossing.They did an amazingly good job!


With the carving finished we all initiated the new woodspirit as an official member of the group with a pinky kiss.  One by one, we each kissed the tip of our little finger then quickly gave the spirit a fast tapping. It was now there to serve, please, and protect us from all that roamed the wooded forest around us.

The boy seen in the picture to the right was one of my most loyal students and he volunteered to haul the gallon can of finishing stain about a half mile to the carving so I allowed him the high honor of applying the final finish. After this "honey-brown" stain was on he couldn't hardly keep his eyes off the new woodspirit and like the others, he would repeatedly walk past it in admiration. These students did a great job and couldn't be prouder of the new woodspirit friend that has found a new home guarding the entrance to their campsite.

Sunday, July 18, 2010

Easy To Carve Hillbilly Pencils

Here's an easy carving project that I've recently re-discovered: carving hillbilly pencils. For the most part they are pretty easy to make and carve because even if your carving doesn't make it to the level of a Picasso, then you've still got a pencil.

Lately I've been using hillbilly pencils as a project in my carving classes with the kids and they're really enjoying them. As you can see from the pictures my first pencil ended up having a funny little hairy-legged roadrunner on the top. I used a stick that had a forked top and carved out some shavings for feathers on one end. It's hard to see but I also cleaned out the wood between the birds long legs thus giving it a little more perspective and eye catching charm for the observer. All in all it took about an hour to prep the stick, place the lead tip, paint, and finish it up completely but times will vary depending on skill level and complexity of your design.
Although I used a well seasoned twig of sweet birch for my roadrunner, I later discovered that rhododendron twigs worked great. Most of these east coast bushes have tons of dry twigs on their lower ends making them perfect for my purpose of pencil making. The wood is amazingly strong and they have very interesting twists and bends to tickle the imagination.

As seen in the pictures to the left I first trim the twigs to the desired length and try to leave a "fork" on top that I can use for an interesting design. Next I use a very small drill bit (same size as lead "graphite" being inserted) to drill out the hole where the writing lead will go. I only make this hole about an inch deep, plus or minus.

Next I saw up a bunch of old woodshop pencils and strip them for their graphite "lead". You can use a nice thick lead purchased in a box but I have so many old used up pencils in the woodshop this is what works best for me. Plus, it's a great challenge to see how good that you can get stripping the lead without breaking it. I then roll the tip of the lead in some wood glue then insert it in the drilled hole and allow to dry. Before long I'm writing right along with the great admiration of all my hillbilly (and non-hillbilly) friends.

The picture to the right shows about 30 pencil "blanks" ready for carving with the lead tips already in place. I suppose that it took me about two hours to gather them out of the woods, to cut and prep. This is a great way to prepare for success during a woodcarving class with kids and I'm amazed at some of the designs they come up with. I'll post more pictures as they develop. Have fun and keep on carving... and hopefully writing with your new funky-fine hillbilly pencil!