Thursday, April 29, 2010

Tying My First Fishing Fly


Another one of my favorite stations at Conclave 2010 was fly tying. When I  approached this activity the first thing that caught my attention wasn't the fly tying, but instead it was the intense focus of the participants. Unlike other stations that had more action involvement, the fly tying had these folks brains in full gear.  It was a joy just to watch that focus between the eyes and hands as their small fly creations gradually transformed into works of art.

After several minutes I couldn't stand it any more and just when one of the instructors of the fly-tying wanna-be's invited me to take a seat and give it a try. That's all it took and I was off to doing something with my hands that I'd never before experienced and something that I hadn't planned to do.

I was a little skeptical at first and a bit hesitant, perhaps because I've always just picked up my flies and lures at the bait shop when I hit the lake or streams. And besides, I was completely absorbed with just watching the intense focus of the other participants. That was reward enough for me but now I had to shift my brain from observer to participant, from teacher to student.
My coach guided me step-by-step through the process and my eyes were so focused on the small hook clamped securely in the little vise. When you're tying a fly I learned about the intense concentration that is required to get it right so I had little opportunity to look my instructor in her eyes. Perhaps it was also just the "fumble and bumbe" that any new student has when learning to do something new with their hands. It was sort of awkward being in the students chair when I was more comfortable being the teacher so I had to make other adjustments too.
After about 15 minutes of patient personal instruction I gleamed with pride after completing my first fly. I was so excited that I now didn't want to leave the station and I proudly walked around showing off my fly to other onlookers.

Now, I must admit that it's going to be another monumental task for me to pluck that fly from my hat because I just want to show it off. Perhaps I will make another one to actually go for the big one, but I have a feeling that this fly-made with my own hands- is going to be on that hat for a very long time.

Wednesday, April 28, 2010

Woodspirit in Poplar Walking Sticks

Nothing too special here... or at least to me; just two new woodspirit walking sticks. Just recently two such sticks were requested so I've been working on them, here and there, for the last couple of weeks when I can find the time.

Although this woodspirit is my "generic" brand when carving walking sticks, the reason that I decided to post it here is that it's the first time I've used tulip poplar for an order. I've been using these particular sticks when teaching the kids in my woodshop and Scout classes to carve, but until now I've shied away from them in favor of the harder maple, dogwood, sourwood, or sweet birch. These poplar sticks are super plentiful on our side of the mountain and the dried limbs fall out of the tall trees during the frequent winds storms that come our way.
These two sticks were super solid and didn't bear any of the seasoning cracks that poplar so often produces so I decided to use them. Although most poplar sticks don't meet my standards when an order is given, these two sticks did. I especially love the way that poplar takes on the paint and finish with such a bold look that almost jumps at you. The final antique wash sets in excellent with poplar producing the greatest dark/light contrasting that you could hope for. I love using poplar for my walking sticks but it's more the exception than the rule.

As you can see I also painted on five animal tracks below the woodspirit which gives the stick a great compliment to the carving. I hope that the new owner enjoys them as much as I have in carving them.

Monday, April 26, 2010

Rustic Furniture: A Podium For Camp Raven Knob

One of my favorite occupations ever since the 1970's has been making rustic furniture of all kinds. It's organic, it's natural, and it creates an aesthetic and authentic atmosphere for any room.

About ten years ago I built the podium seen to the right although it has been in storage and out of use for about 3 or 4 years. Using mortise and tenon joinery it remains strong as an ox! Just this last weekend I completed a total re-furbishing of the podium which also included the addition of a new identification sign hanging on the front side that will compliment it's new home.
It has been my goal to finish it in time for Order of the Arrow Spring Fellowship at Camp Raven Knob in May. This is a continuation of my "service to others" oath as part of my OA membership.

As seen in the close-up picture to the left I made the "feet" from splitting a nice seasoned piece of eastern red cedar. It almost looks like it's walking on the floor. I made the two legs and braces from sycamore which the kids in woodshop sometime refer to as camouflage-wood because of it's multi-colored bark. The top of the podium is made from solid mahogany so that rich red luster of a shine is the real thing!

As seen in the pictures to the right I also made an identification sign to hang from the front that mainly identifies Camp Raven Knob but also our own Boy Scout Troop 555. On the bottom side of the sign I also made an Order of the Arrow- arrow that identifies our Lodge 118.

It is my intention to present this rustic podium at Spring Fellowship next month as a permanent fixture in the Scoutmaster's lounge. The Scoutmaster's lounge is the site for a lot of top level meetings and presentations that have included congressional members and governors. I think that it will be a great addition and helps me to feel worthy of my OA oath of, "service to others."

Sunday, April 25, 2010

WIP: Carving A Two Foot Table Totem Pole- (Part 2)

 WIP= "Work in Progress"

Some time back I began posting the progress of my latest totem pole where part 1 can be found here. As you recall it is 23" tall and will be the host for five characters; the eagle on top, then a raven, a frog, a beaver, then a bear on bottom. As I covered the eagle in the first posting I will now continue with the raven.

As seen in the picture to the right the first picture shows the initial roughing-out of the raven. Like all of the characters, this is the first carving that takes place and the only carving where I place the wood in a table vise and work with my larger knives using a mallet. As you can see quite a bit can be accomplished with relative ease during this roughing-out phase.

The next picture shows that I have smoothed up the cuts left behind by my larger knives and mallet while in the vise. Also I have used a pencil to sketch out the eyes and beak lines. I am still amazed at how great this tulip poplar is carving and it's just about as nice as basswood... but I won't quite go there just yet. The final picture shows the completed bird less the paint so now I can move on to the little frog.


Just below the raven is seen the little obscure square block that will gradually become the frog. Although hard to see in the picture I have lightly used my pencil to sketch in the rough outline of the green creature. Looking closely can also be seen exactly where the frog will be located as seen by the darker uncarved wood.

The three pictures show most of the frog completed but later I will paint in the fine detail of the little eyes and the wort's. The  frog wasn't too difficult and I would consider this a flat relief carving. Other variations could include carving the frog "around" the pole which I'm sure would look very appealing  but this is what I did for this pole.

By carving in a flat relief style, this gave me a nice area on both sides of the frog for adding some bonus decorative carving. Therefore I added a variety of Indian symbols which make the pole more interesting.


Next I'll go to the beaver and as usual the first picture to the right shows it just after removing the wood from the vise where I used my larger chisels and mallet for a rough-out. A lot of the carving on this creature was simply removing the rough outer wood and producing a smooth surface, then removing wood where necessary to make the carving stand out... especially around the legs on each side.

Beavers are one of my favorite characters to carve on a totem pole because you have those two gigantic front teeth and an interesting "checked" tail. The teeth and that big flat tail make the beaver unique and I always get excited about working on them.


As seen to the left I finish carving the bear which is the final character on this table totem pole. The bear provides the strength upon which all else rests and some people consider the bottom of a totem pole as the most important part in symbolism or story telling.


 The bear is the final installment for part 2 of this series and I will next move on to carving a set of wings and making a nice stand from western white cedar. After that I will show you the final totem pole in full color after the final finish.

Saturday, April 24, 2010

Kids Choice: Mallets vs. Stools

As previously mentioned in the last posting the pioneering woodshop station at this years Conclave event you had the opportunity to make a wooden mallet or a rustic three-legged stool, as seen in the picture to the left. I don't know for sure why but during my observations throughout the day, I'd say that approximately 80 percent of the kids chose to make a mallet instead of a stool.

This observation troubled me for a while but after a bit of thought combined with almost 30 years experience of working wood with kids I believe I have an accurate answer. In a kids mind the mallet represents visions of an object in motion with great impact when used. Boys are all about action-oriented behaviors and that must be the lure to these rustic wooden hammers. On the other hand a stool is more sedentary where one can plant their body or perhaps a flower pot. Not much action there but kids still like them. I'm just saying that when given a choice a boy is going to choose "action" over "in-action" most of the time and that's what I'd put my money on.

 As seen in the next set of pictures to the right the first step in making a stool was to saw yourself a nice chunk of log using the crosscut saw and there was plenty of adult help available to get this heavy-duty chore done. Next the log was split in half thus producing two sides for two stools so this is a great project for partnering up with someone but I didn't get any pictures of that. Just think of splitting firewood using a wedge.

As the fellow in the picture to the left is demonstrating, the next step after splitting your chunk of log was to hew down a flat splinter-free surface using the foot adze. I've used a foot adze for hewing a lot of log cabin logs over the years but I did mine freestyle using the traditional technique. At Conclave they had a safety log set up for this chore as seen in the pictures to the left and I suppose that was a good idea for this event.

In one of the pictures above and to the right can be seen folks using the wood mallet to hammer in the legs to their stools. The tips of the legs had to be filed down a bit first so that they would have a good snug fit inside the holes. All of the stools built were 3-legged so builders had to think about proper spacing and slant that would result in a firm standing stool.

And of course, as seen in the picture above to the right, you could take your completed stool to the branding station and enjoy burning in a variety of symbols. Building a small simple wooden stool is a fantastic hands-on exercise for any child (or adult) but be prepared to have a little more patience than would be needed for making a wood mallet. Every kid should have an opportunity to experience rustic woodworking and the Boy Scouts excel in these hands-on activities.

Wednesday, April 21, 2010

A Boy And His Hammer

My favorite activity (by far!) at Conclave this year was found on the OAX (Order of the Arrow eXperience) at the pioneering station. When I first arrived more than an hour had passed by before I knew it because this was the hands-on mecca of this years event.

Here the kids and a few adults worked with intense laser-beam focus making rustic wood hammers and stools... but for this posting I want to focus on the hammers. Several times before on this blog I have more than stressed the importance of hands-on activities for kids as an important catalyst in development of their character, spirit, and worthiness while finding their place in the world. This pioneering station was one of those perfect hands-on activities that scored ten-fold on all counts.
Seen in the picture to the left is one such Scout that I traveled with to Conclave. It was a joy watching him saw his wood, drill his hole, then learning to set his handle into the hammer head with such intense focus.

Throughout the remainder of the day he carried his new wood mallet everywhere he went and showing it to everyone with gleaming pride. In campsite that evening he was still latched onto it like the velcro on my knife sheath.

Since I was the woodcarver in the troop he politely asked if I would carve something on the handle for him and he was sure to tell me that I had full creative freedom. He was very anxious to see what I would come up with as I rustled around gathering up my carving knives. As you can see in the picture above I ended up carving  a nice little woodspirit into the handle which only generated more pride in the tool that he'd made. Off he went again showing it off to anyone who would listen to his story and look at his hammer.

All the way back on the drive from the beach to the mountains I believe that he held onto that wood mallet all the way. Before departing his father expressed his gratitude to me for helping his son with his hammer and the woodcarving. That must have been the proudest kid in North Carolina and I'm anxious to see if he hangs it on the wall in his room or if he wears it out using it. Either way it will be okay because the power of a simple hands-on project worked its magic and really made the difference in one child's life today.

The first step in making a pioneer mallet was to decide the size of it, then choosing the appropriate wood for the handle and the head. Some would choose to make the biggest mallet possible while others opted on the smaller side. As seen in the picture above they would then use a band saw or a crosscut saw to trim the wood down to usable proportions. For a while I enjoyed helping the Scouts saw their wood and everyone of them gave me a sincere thank-you which was encouraging. Finally they would size up their handle to decide which size drill bit to use then hand-drill their hole into the head.

As seen in the pictures above the next task was learning to manipulate a wood file on the tip of their handle until it would fit snug in the hole. When a good fit was found a notch was sawed into the handles tip to help it dry and fit tightly as seen in the pictures below.

When your mallet was completed some of the kids chose to take it to the blacksmith station and burn a fantastic symbol of their choice into the wood.
As seen in the picture to the right is one very proud Scout as he branded his mallet then showed it off for the crowd. This kid is smiling but what you can't see is the live-action trembling in the core of his soul from being so proud of the mallet that he'd made with his own hands. It just don't get any better than this!


I'm not sure exactly how many kids went through the pioneering station on Saturday but the area was at full capacity from opening to closing. What is for sure is that a LOT of kids are a little better off today because some caring adults had the patience to ensure their success and the vision to make it happen. From such a simple hands-on activity I saw the confidence in a lot of kids boosted upwards and the world seemed to become a somewhat gentler place to be. If you want to ensure that the next generation has the best opportunity to succeed then help a child use their hands in a constructive way. You won't be disappointed.

Tuesday, April 20, 2010

Conclave 2010: The Video


 As mentioned in the previous posting last weekend was a big time for North Carolina Scouts who have been nominated by their troops for membership in Order of the Arrow. Only once each year do all of these Scouts come together and meet for regional elections but that's only a very small part of the event.

Below I have put together a short video that gives a very small glimpse of what goes on at Conclave, but remember that it's only a very small glimpse. It must be experienced first hand to absorb it's full impact.

Monday, April 19, 2010

SR-7B Conclave 2010 at Camp Boddie

On April 16-18 the Southern Region Section 7B of Order of the Arrow held it's largest event of the year at Camp Boddie which is nestled on the wild and wooded banks of Pamlico sound. All six lodges were represented bringing more than 1,200 Arrowmen and Brothers together for a very spirited weekend of competition, unique exhibits, patch trading, fellowship, and more hands-on opportunities than I've ever seen assembled in one place.

 Conclave is the premier (and the largest) Order of the Arrow annual event of the year. It is also anticipated more than any other event which is usually held in the spring. Each year it rotates around the great state of North Carolina where all six Councils enjoy hosting this action packed weekend.


Next year I'm proud that the Old Hickory Council will be the host for the 2011 Conclave at our very own Camp Raven Knob in the cool North Carolina mountains. Only those Scouts and leaders who exemplify and best role model the Scout Oath and the Scout law in their daily lives can be chosen to attend. Order of the Arrow is the highest honor society in Scouting and truely is the best that America has to offer the future. These kids are the best of the best and continuously renew my faith in the next generation.

Right now I have only posted a few pictures from the event that mostly have to do with Scout spirit because that's what it was all about. Yes, there was a lot of competition for this years spirit award and I'm proud my Lodge 118 won that award for 2010. We were really pumped and showed almost immortal spirit and pride from sun-up to sun-down... and sometimes even more!

The theme for our Lodge was "Flashback to the 60's" so all of the pictures that you see of our fine upstanding citizen boys and leaders dressed like hippies are us. Also you might notice that I carved 11 of the peace-sign necklaces that some of those "hippies" are wearing for the Scouts and leaders that I traveled and camped with in Troops 529 and 561. I spotlighted those necklaces in this posting.


I will post a video of the event as soon as I can complete putting it together. Most of all I look forward to posting the hands-on opportunities provided at this years event which deserve their own individual spotlight. My favorite was the primitive woodworking station where the kids and leaders had a fantastic opportunity to make their own wood mallets or stools. Other stations that I will report on will include flint knapping, games, basketry, tomahawk throwing, blowgun shooting, music, Indian dancing, primitive cooking, and much more.

Thursday, April 15, 2010

WIP: Carving A Two Foot Table Totem Pole- (Part 1)

WIP= "Work in Progress"

OK, just to set the record straight before this project gets started, this totem  actually stands 23" high despite the title that says it's 2 feet. Today is April 15th which is also tax day so I'm just stuck on rounding my numbers out to the nearest whole.


A table totem pole with about a 2 foot height was recently requested as a retirement gift due on April 23rd so I rousted out a nice piece of rough cut tulip poplar that originated from a local sawmill. (See poplar leaf to right>>>) It is approximately 1-5/8" square and I also left plenty of extra wood at the bottom where I will eventually attach a stand. Normally I would use basswood for a project like this but I came across this batch of poplar about 15 years ago and it carves unusually nice.


As seen in the pictures on top I first measured out center lines on all four sides of the pole which will help me to keep the characters in proper perspective as I carve. I then went on to do a rough sketch of all the characters starting on top with an eagle then followed by a raven, frog, beaver, and a bear on the bottom. Coincidentally, this table totem pole is very similar to the one that I personally presented to the governor of North Carolina in 1996.

As seen in the pictures to the left I then put the pole in a table vise then used my larger carving knives and mallet to rough out all the characters.

To the right you see a couple of pictures of the eagle which sits proudly atop the pole. After roughing out all the characters in the table vice I've now taken it out and will carve the remaining detail holding the pole in my hands and using my smaller carving tools.

Starting with the eagle you can see that I've rounded the breast area and gouged out a rough textured feathering effect which makes it a bit more interesting. I've also begun carving the feet and the eyes and the beak are sketched in. As you can see in the picture to the far right, I like to leave as much of my center lines on the wood as long as I can so that I can keep everything in the best possible perspective until the very last minute.
Looking at the pictures to the right, I've completed the carving of the eagle. I used my small palm v-parting tool to make the three claw notches on each foot. The beak and mouth are now completed along with the two eyes.

I also spent some time just going back and cleaning up all of the cuts while continuing to get the bird in proper perspective.

OK, in the next installment I will continue carving down the pole with the raven and frog so please come back and join me for the carving of this little two foot table totem.

Tuesday, April 13, 2010

Carving Fat Lighter Flowers for Firestarting Kits

This evening I was part of a Boy Scout council roundtable meeting and I usually bring something hand-carved to be used as door prizes. Last weekend I made up about 5 fire starting kits for tonight's meeting which were quite popular as door prizes.

Gathering fat lighter is one of my favorite pass times while on my long walks in the woods. Fat lighter is the congealing of the sap in pine trees usually found in the stumps of decaying trees. This orange colored concentration of pine sap burns better than gasoline and is the perfect naturally found fire-starter.
Carving these small fat-lighter "flowers" is a lot of fun and it's something that you get much better at the more you do it. The wonderful aromatic smell is also alluring as you carve these little fire torches as the sap smells akin to a very strong pine aroma and you might detect a hint of turpentine smell since this same sap is harvested in the southeast for making it.

I just hold a small stick of sap wood and turn it with my fingers while pushing the shavings forward and the "flower" will gradually bloom right before your eyes. In Boy Scouts these little fire starting torches are called "fuzz-sticks" and every 2nd Class Scout learns to make them as part of their fire building requirements.

To make my little fire-starting kits I use a small snack-sized zip lock type plastic baggie. On the bottom I put several sticks of fat-lighter kindling, then 4 or 5 fuzz sticks followed by a small bundle of tinder made from the inner bark of tulip poplar trees.

This makes a nifty little gift to give away to some of your outdoor friends and I guarantee you that they'll love it. Tonight at the Scout meeting they were the first items to be taken by the folks who had the winning numbers. I guess that I've done my good turn for today. :)

Sunday, April 11, 2010

Native American Day at Wake Forest University

This weekend the Department of Anthropology at Wake Forest University sponsored their third annual Native American Day for all Cubs, Scouts, and Explorers in the Old Hickory Council.

This was a great opportunity to participate in plenty of hands-on activities including atlatl throwing, blowgun shooting, flint knapping, wigwam building and Native American stickball which is a game that's over 400 years old called toli.

There were also several Native American craft and food vendors and Indian dancing on the grounds. Best of all, Scouts had the opportunity to work on their merit badge requirements for Archaeology, American Cultures, Indian Lore, and  Pioneering. Opportunities like this don't come very often so many thanks go out to the Wake Forest Department of Anthropology!

As seen in the pictures above and to the right, one of my favorite hands-on activities was found at the flint knapping station. Here you had the opportunity to get a feel for how Native Americans made the sharp stone tips used on arrows for hunting and for war. Excellent Wake Forest staff provided detailed instruction while simultaneously sharing some wonderful stories of Indian lore thus making the whole experience come to life in a very real way.
 Other hands-on activities included the opportunity for Scouts to use an atlatl thrower and a blowgun. As seen in the foreground of the picture to the left, a couple of Scouts are preparing to blow their darts in a bamboo cane blowgun at a deer target about 25 feet away. The next picture below shows the Scouts in action as the darts hurtle toward their targets.

In the background of the picture to the left can be seen Scouts receiving instruction as they prepare to sling spears toward a target using the Native American atlatl thrower.
We greatly appreciate the staff at the Wake Forest Department of Anthropology for sponsoring this great opportunity for area Scouts. Way too many kids today are stuck behind computer games and TV's or on the streets in trouble and this is the kind of hands-on activities that really make a difference in a child's life.

Friday, April 9, 2010

Woodshop Class Goes Outside: Carving A Tree Spirit

Who says that woodshop class has to be held in the woodshop every day of the year? With one of the coldest and snowiest winters ever we've been cooped-up long enough so today's class was held in a fine wooded spot on our 900 acre campus.

Weather in the mountains is starting to get warm again with today bringing full sunshine and comfortable temperatures in the low 60's (F) so it was the perfect environment for learning something new. As you can see from the picture to the right I had everyone in the class facing me as I carved a huge new tree woodspirit. (See the red circle)

Although you can't see the initial sketching in the pictures to the right, I first used a red marker to make a rough outline of the eyes and nose in a live tulip poplar tree where about 1/3 of the diameter had exposed inner wood prime for carving. Apparently the tree had been scraped by a tractors bucket a few years ago leaving behind the perfect carving surface as I've had my eye on this particular tree for quite a while.

This was a relatively quick carving project since time was limited but I wanted this class of boys to have a unique experience and to witness something that I'm sure they've never been exposed to before. Normally I would rather have first done a rough outline of the spirit with a chainsaw giving it better depth, but that wasn't possible today so this ended up being more of a "surface" carving than I would normally have done. It still ended up being quite nice leaving the class with an experience to talk about for some time to come.


Unfortunately I didn't have time to put the final "honey-brown" stain and preservative to put on it so we'll get that done sometime next week. I'll have to post another picture upon the final completion. The dark stain tends to make a tree carving very bold and helps to quickly catch the eye of a passerby so I can hardly wait to get that done.
As you can see from the pictures to the left most everyone also had an opportunity to do a woodcarving project of their own before the class was over. While I worked on the big tree spirit I also had to keep a close eye on ensuring the kids safety as they had a grand time making mini-canoes, spoons, and carving their names in odd pieces of wood. What a great woodshop class and what a great day!

Wednesday, April 7, 2010

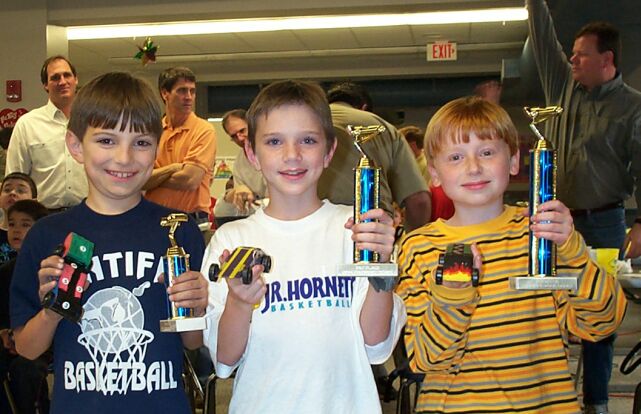
The Lessons Of Pinewood Derby

Pinewood Derby has been alive and well for over 50 years as a premium Boy Scouting event. Although the races are predominately for preteen Scouts, it is my experience that this event can generate just as much enthusiasm, competition, and fun for every age group including adults. Our troop just had our annual "April Fools Day 500" race and most of our kids are 11-16 years old and of course, we always have an adults racing category.


So just what are the lessons that can be learned by participating in a pinewood derby race? That is almost an overwhelming question since there are so many answers on so many different levels. The greatest benefit from participating in a pinewood derby race is the opportunity for quality time between parent and son. It's a time when the video games and the TV can be turned off and stronger  relationships can be built with this simple hands-on project.

As a woodshop teacher it is one of my greatest joys to share my experience building cars with the kids. Some will listen and absorb everything that I have to say while others will take off on their own. Some will polish their axles and  align their wheels for the fastest possible speed while others will concentrate on just a sharp looking car. Either way it's very satisfying watching their ideas on paper transform before our eyes into a potential winner.

Secondly, building a pinewood derby car is a hands-on activity where a kid can learn to use a lot of tools such as saws, drills, chisels, carving tools, etc. There is also the potential for lessons in craftsmanship, physics, strategy, and execution.

Lastly pinewood derby is a great lesson in social dynamics. Kids learn a lot about sportsmanship and giving their very best effort when building a car then racing it against many others.

Pinewood derby is one of the most anticipated Scouting events each year where thousands of adults and kids have way too much fun. More than the fun I'm always looking for new lessons to teach that will help kids become the successful adults that they are capable of becoming. The 2010 race is now history but I've already begun planning my car for next years race. No matter how many decades that I've been racing I always find new things to learn about these simple pine cars that have the potential for so many life lessons.

Monday, April 5, 2010

Pinewood Derby Totem Pole Car Finished

So many projects and so little time, but I did finally finish the totem pole pinewood derby car that I started in this post a while back. The race is over but I decided that I've won enough trophies over the years so I didn't build this car for speed; rather I went for making a unique car design and I believe that I hit the mark on that account.

The design has an eagle on top, a coyote, a frog, an Indian chief, then a bear. This particular car makes a great addition to my other table-totem pole display when sat upright and I'm sure that it will be quite a conversational piece for years to come.