Our education theme this session has been "Around The World In 80 Days" so this is what the kids math, language arts, sciences, and other subjects are based upon. In woodshop class today one of my students began a mini skateboard project but I'm still not sure that a person could make it around the world on one as their sole source of transportation but then again I haven't referred to
Guinness Book Of World Records either and who am I to say that the imagination of a 14 year old is invalid... so permission to begin was granted.
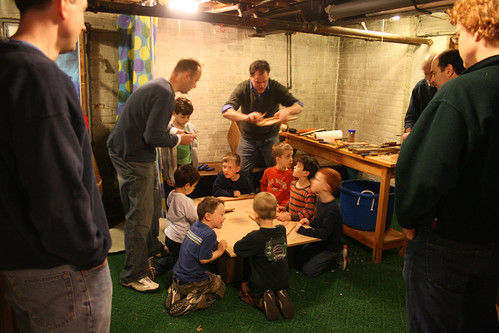
Since our woodshop program isn't geared for the construction of a full-sized skateboard I have found that the kids enjoy making these mini key ring sized skateboards just as much and they have become quite popular. My 13, 14, and 15 year old students seem to be the ones most infatuated with making them and I enjoy watching their minds figure out just how to make them work.
First, there's just something magical about making these little 4-wheeled boards that sparks the imagination and engages their brains. Secondly, making miniature woodshop projects is also a great way to "grab" a students attention for detail in even a more challenging way than making it full sized. I also don't have to worry about them breaking an ankle (or worse) from something that I approved for their construction. Last of all I always teach my students to start small then progress to the larger project as you pick up the necessary skills of fine woodworking. I usually tell them that when I first wanted to carve a chainsawed bear I first carved a small one that I would use for reference. I tell my students that you don't start out building the
Taj_Mahal until you first learn how to build a doll-sized house, then progress to the next level and so on. It's a good lesson for teaching and a good lesson that they can also think about applying to how they will be successful in living their own lives. Building small while learning the skills of woodworking also ensures success.
Today Anthony wanted to make this project but he asked about how he'd make it with wheels that actually worked. Most of the kids choosing this project center most of their attention upon a compelling paint job with their mini skateboards so I was thrilled when this student wanted to take the mechanics of his woodshop project one step further. And best of all he wanted to partner up with me for a workable solution so another journey in discovery had begun. I might have been even more excited than my student which is usually the case in any class I'm teaching.

We first began with a small block of pine and sketched off a portion that measured about 1" wide, 1/2" deep, and approximately 2-1/2" long. Anthony is a bit slow when it comes to working out his own projects and normally this project would have been above his level of understanding to complete on his own but the class was small and well behaved so I decided to embrace this opportunity to work with him one on one. In doing so I first began using my pencil to sketch out a rough outline right on the wood until Anthony's vision of the project was achieved. Even the slower kids usually have excellent visual perception and usually just need for someone to help them project their vision into reality so I don't do it all for them but use plenty of prompts, sketches, and a lot of questioning until I can help them transfer their ideas onto the wood.
Next we cut out the body of the little skateboard using the bandsaw although a scroll saw would work just fine for such small stock. Now the real challenge of this project was coming up with a way for the wheels to actually turn so we then placed our attention on the mechanics of making this a reality by using only wood for the friction that would be produced by wheels, axles, and trucks. For all three of these components I knew that working with dowel rods would be our best bet for success so we gathered up a variety of sizes until we determined that a 3/16" rod would work just right for the axle when inserted into a 7/16" rod as the trucks. 7/16" was also just the right size for the wheels when fitted into the smaller axle rod.

The axle did fit a little tight so using a pocket knife in a "scraping" motion Anthony got the wheels to spin pretty good. The 3/16" hole that we drilled into the trucks rod using the drill press was still a little too tight and Anthony wanted a good spin for his wheels so we then came up with another solution. As you can see in the picture to the right we cut a short arc across the center of the trucks rod thus eliminating most of the friction created by the axle. This worked just perfect and a big "yelp" of success was heard from both of us across woodshop class. Success was ours and we made sure everyone in class knew about it!
We then used wood glue and a good clamp to attach the wheel assembly to the skateboard body so now we only needed the patience to allow it to dry, then make another one for the other end of the board but that will have to wait until the next woodshop class next week. Time was gone.
Nothing like sparking the imagination of a kid (and one anxious teacher) while trying to capture as many opportunities to teach as is possible in a 45 minute class and today was a good day for being a teacher in woodshop class.


